
Do you know, How to make Mehndi paste? Do you know how to make Mehndi Cone?
Most of the Mehndi artists prefer to make Mehndi paste and Mehndi Cone at home. When we buy Mehndi come from any shop, we don’t know which material they use.
If we use inferior quality, sometimes it causes allergy or itching on the palm. It affects our reputation. So, we should not compromise with quality. Making of Mehndi paste and cone is easy.
Here I am sharing with you How to choose Mehndi powder?, How to make Mehndi paste and how to make Mehndi Cone.
What in it
- How to choose the best Henna powder
- Which ingredient used in Mehndi past
- Mehndi paste making procedure
- How to make mehndi cone
- Conclusion
- FAQ
How to choose the best Henna powder
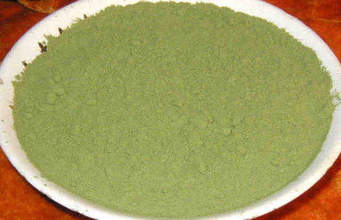
It is very important to choose good Mehndi powder to make Mehndi Cone. There are a few points that one must keep in mind while choosing Mehndi powder.
You should always buy fresh Mehndi powder. If you want dark color of your Mehndi.
Buy it from any trustworthy shop.
Mehndi should be pure and natural. It must not contain pesticides or chemicals or chemicals.
Get only pure henna powder.
Which ingredient is used in Mehndi?
If you are learning about Mehndi and its application it is very important for you to know about how to make Mehndi Cone? How to soak Mehndi? How to make Mehndi paste? If you are looking for the answer to these questions, you are in the right place.
Ingredients
- Henna powder
- Water
- Henna oil
- Tea water
How to Make a Mehndi Paste?
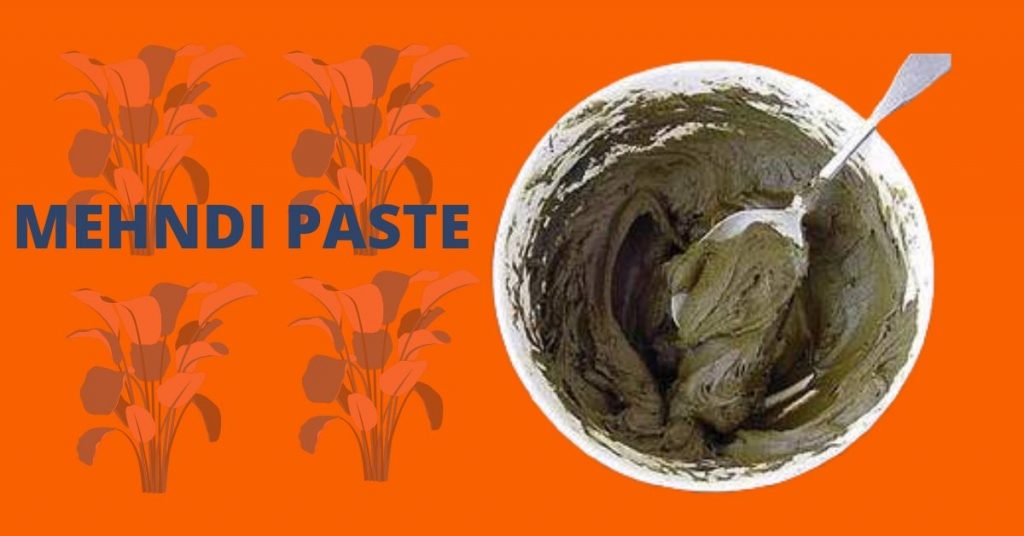
You can get the best quality of henna paste when you make it on your own. It is quite easy to make a paste at home.. you just need to keep in mind some points., practice makes a man perfect.
Procedure to soak Mehndi
First, take Mehndi best quality Mehndi powder.
How much Mehndi powder should I take?
The answer is, If you take one hundred grams of henna powder to make the paste, you can do 150 to 180 tattoos depending on your designs and length.
If you are new, don’t take all powder at the same time. Take, only ¼ or 1/3 of your powder. You can experiment with your recipe to find what works best.
First, Take one container or bowl. I prefer to use a glass bowl as it is easy to clean up and doesn’t stain or keep the smell.
Second, Then pour some water in it.
It is advisable to take water before Mehndi powder so that your Mehndi does not stick to your container. Then take henna powder according to your requirement,
Third, Add some tea water in it. You can add some lemon juice too. But it is optional. Add some drop of oil/tea tree oil/lavender oil in it than mix it well. This oil helps to preserve your henna paste and also add delightful smell in the paste.
You can add sugar to it. It is also optional. But sugar help henna to keep wet a long time and stick in the skin very well for a long time. It makes henna more flexible and result in a darken stain of henna.
Be care full of adding water. You should add water with a spoon. Mix it for a long time. Don’t make it too thick or don’t make it too thin.
You should soak your Mehndi before for 4 or 5 hours. It is the minimum time that you should soak to get the best color of your henna paste.
How to make mehndi cone??

You can apply henna. Some people use a matchstick to apply henna. But this method has some drawbacks. Some designs cannot do with these methods. Another way to apply henna is to use squeeze bottles available in the market with pre-mix paste.
It is very easy to use. You can also purchase a pre-made Cone that available in the market. But if you want to use your henna paste made at home. You can make a cone at home. It is a very simple and inexpensive method to make at home.
Here, I am sharing very simple steps to make the henna Cone at home.
So let’s make a cone with homemade henna paste.
Things require making Mehndi Cone.
- Small freezer bags – one will make two cones
- Scissors
- Scotch tape
- Twist ties or rubber band
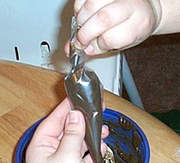
How to make cone?
Take one sheet of soft plastic paper. You can use gift wrapping paper as well. It is easily available in any stationery shop near you. You can get pre-cut sheets that available online.
Then cut it in 6-7 in (15-18cm). You can change size according to your convenience.
Hold it and turn its one side roll in issuing your thumb
You can use this basic rolling technique with a triangular, square, or rectangular sheet.
By putting your finger on the hole of cone check the hole is ok or not. If you want to close the cone top and then cut according to your need. Otherwise, you can make a hole according to your requirements.
If the hole is ok, then cut the tape and paste on the cone. Now your cone base is ready. This type of cone base also you can buy from online. But to make a cone base is very easy. So just try it.
Now you have to fill henna paste in a cone. How to put the paste in a cone
Take one plastic carrot bag and put it in a container and fill it with paste. Now cut one side and make a hole. Now put this bag in a cone and fill the cone with paste. This way you can fill cone without and mess cone or your hand. You can put paste by using a spoon too but take care stain of henna on your hand quick.
How much paste should I fill in it?
The answer is. Fill 2/3 part with paste and left 1/3 part. Push paste downside Cone and check the hole of the cone. Set your paste in cone properly.
Now upper part of the cone, you can fold it or roll it as tightly as possible. Cut the long tape and place it on top. If you want to tie band, twist the upper part of the cone and tie rubber bend on it. Now your cone is ready for use.
Make sure that your leftover paste store in the refrigerator or freezer when you are not using it to keep it fresh and fervent from drying out.
If your cone gets clogged, poke the hole with a needle.
If your cone not made properly, you can shift it into a new cone.
Before you apply henna, practice holding Cone correctly.
Everyone’s style of holding a cone is different. Like some people hod the cone from an upside and some people from the downside. It doesn’t matter.
When you draw designs with cone, first you have to give low pressure. Then you scratch line. At that time you can give pressure.
When you fill inside your shape give more pressure and spread henna. Then you draw a double line in your design, both lines should be equal.
Conclusion
Making Mehndi paste and Mehndi cone is quite easy. You can make it at home with minor effort. It is advisable to use a small cone. When you use a big cone, you have pain on your hand and pressure on the thumb.
FAQ
A-1 It is advisable to soak for 6 to 8 Hours
A-2Its depends on your size of cone and design you select.
A-3 No, It is not compulsory but if You add it will help to make your paste smoother.
A-4 No, It is not compulsory but if you add you will get rich color of your Henna
A-5 Generally you need to add 10 to 30 ml oil per 100 gram Mehndi powder.