

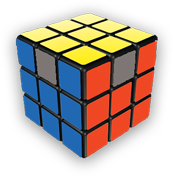
Solving Rubik’s cube is not that difficult if you know its concept and algorithms. The more algorithms you know, the fastest you can solve it. This is the advanced guide, if you are a beginner and don’t know the basics of Rubik’s cube then head towards my other blog on, “How to solve a Rubik’s cube in 1 minute? A Beginner’s Guide”.
What’s in the Feed
- Solving Rubik’s cube in under 30 seconds
- Advanced notations
- The shortcut algorithms or you say the cheat algorithms
- F2L
- OLL (2-look OLL)
- PLL (2-look PLL)
- PLL 21 Algorithms
Solving Rubik’s cube in under 30 seconds
After you become fluent with the beginner’s guide, you need to proceed to the advanced guide, which teaches some more algorithms, and you know the more the algorithms you know, the faster you can solve it.
Practicing the advanced guide will make you reach 30 seconds mark in solving time, which is great progress. However not everyone can solve it within 30 seconds, so if you can, then you are different from normal people, which means your eye-hand coordination and muscle memory are way better than that of an average person.

Advanced Notations
u: Rotating the top and the middle layer clockwise together just like U with the bottom layer fixed.
d: Rotate the middle and the bottom layer together just like D with the top layer fixed.
r: Rotate the middle and the right layer together just like R with the left layer fixed.
l: Rotate the middle and the left layer together just like L with the right layer fixed.
x: Rotate the whole cube like R.
y: Rotate the whole cube like U.
Basically, all the small letter notations are performed by combining its capital letter notation along with the middle layer.
The shortcut algorithms or you say the cheat algorithms
The beginner’s guide required just 11 algorithms to solve the Rubik’s cube, which was easy. We needed to repeat some algorithms many times until we get our result, which was time-consuming enough.
So, there are a number of algorithms for every type of case we could come across while solving it. I say it the shortcut algorithms because they save a lot of time.
Now let’s get started.
F2L (First two layer)
F2L consists of two-part, first making the cross of the Rubik’s cube, then completing the 2 layers at the same time.

Concept
You know how to make cross, I taught this in beginner’s guide of how to solve a Rubik’s cube. And after making the cross you were supposed to place the white corners and then push the 2nd layer edge pieces, right?
But in this guide, we will be making the cross and then pair the white corner pieces with their respective 2nd layer edge pieces and push them to their locations together which will ultimately create the 2 layers at the same time.
So, what we do here is find the two pieces which will make the pair, for example the white corner piece with red and blue color, and the 2nd layer edge piece with red and blue color will make the pair. Then we will take two pieces to the top layer, if it’s not in the top layer, and pair them together and push it to their desired location.
Keep in mind
There are a total of 42 cases in this step with 42 different algorithms to fix it, but since this is a guide and not an algorithm table, I will give you the tips with which you don’t have to learn all the 42 algorithms.

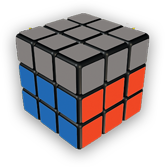
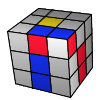
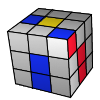
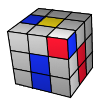
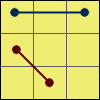
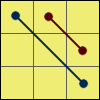
- There are a total of 4 pairs to be solved in this step, and also prevent the already solved pairs from being messed up during the steps. Just take an example of this solved pair.
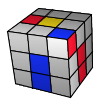
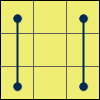
- To prevent this pair from being messed up, you have to keep in mind to not rotate that solved pair to the upper layer, in algorithmic words you should not make Fi and R move while holding the cube similar to the picture. F and Ri moves are allowed, which will not mess up this solved pair.
- You need to be very clear about this tip because this method requires a lot of looking ahead of the positions of the pieces according to which you have to perform the algorithm.
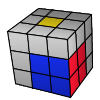
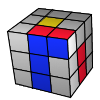
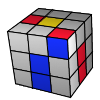
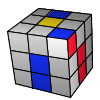
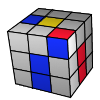
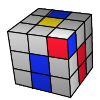
- Hold the cube with the unsolved pair location to the front right side just like in the picture. This will help in making the R and U moves easily to solve the pair.
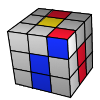
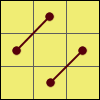
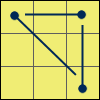
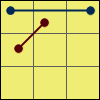
- Always bring the two pieces on the top layer, if it’s not. There are three types of cases (the pictures are just for identification of the position of the pieces and not the exact alignment of the pieces),
Cases
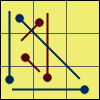
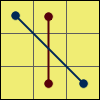
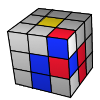 | Case 1. Corner on the top layer with an edge in the middle layer. |
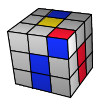
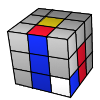 | Case 2. Edge on the top with a corner in the last layer. |
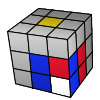 | Case 3. Corner in the last with an edge in the middle layer |
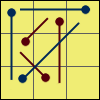
You need to hold the cube as advised earlier, yellow centrepiece on top with unsolved pair location to the front right side of the cube. Then perform the algorithm
R U2 Ri
This will bring the two pieces in the top layer.
- If the two pieces are paired together but wrongly aligned, then you need to separate the two pieces. Perform the algorithm
R U2 Ri
This will separate the two pieces.
- Now match the position of the two pieces with the Cases shown below and follow their respective algorithm.
| Case | Algorithm |
|---|---|
| R U Ri |
 | Fi Ui F |
 | Ui Fi U F |
 | U R Ui Ri |
 | U Fi U2 F U Fi U2 F |
 | Ui R U2 Ri Ui R U2 Ri |
 | U Fi Ui F U Fi U2 F |
 | Ui R U Ri Ui R U2 Ri |
 | Ui R U Ri U R U Ri |
 | U Fi Ui F Ui Fi Ui F |
So, the above cases are when the white face is pointing outwards. But you’re lucky if you get the white face of the corner pointing upwards.
White facing UP
It’s my personal experience that solving the pairs with corners facing upwards is a lot easier than other cases. You should make sure that the corner and edge pieces are separated from each other.

Now follow these simple steps.
- Rotate the top layer to match the front-facing colour of the edge piece with the matching centrepiece, and hold the cube with yellow centrepiece facing up and the edge piece to the right side.
- Now look at the colour of the edge piece facing upwards, it will decide which move to make first R or Ri.
For example
Let us take the edge piece with red and blue colour with blue colour facing up, then we need to rotate that side opposite to the side with matching centrepiece. In this case, we need to move R, so that the up-facing blue colour matches with the green centrepiece.
- Now, rotate the upper layer once, twice or thrice to bring the corner just above the edge piece.
- Now depending upon the move, you made in step 2, you have to perform the algorithm given below.
If you did R turn: Ri U R Ui Ri
If you did Ri turn: R Ui Ri U R
For example, in this case,
- U2, it will bring the edge with red color facing front to match with the red centerpiece
- R
- U
- Ri U R Ui Ri
Now if we group the algorithm together it will be something like
U2 R U Ri U R Ui Ri
Complete the First two layers using the above steps, whichever you may find easier.
This advanced F2L requires a lot of practice, along with looking ahead.
ALSO READ: “Everything about the Rubik’s Cube – You never knew.”
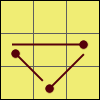
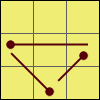
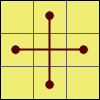
OLL (Orienting Last Layer)
Now that we are done with the F2L, we should now orient the yellow pieces to face upwards. There are a lot of algorithms in OLL, I would prefer not to learn all the algorithms, instead go with the easy method first.
In the beginner guide we first made the cross, then oriented the corners. But in the advanced guide, we will do 2-look OLL.
Basically, OLL consists of 57 algorithms which are a lot. So, making it easier, with 2-look OLL you just need 10 algorithms to completely orient the last layer in maximum 2 algorithms.
In the first set of algorithms we complete the cross, and with the second algorithm all the pieces are oriented upwards.

Let’s get started with the cases.


These total of 10 algorithms in 2-look OLL will complete the OLL in just 2 steps.
PLL (Permutating Last Layer)
There are a total of 21 algorithms in PLL, but in this blog I will teach you a 2-look PLL method, in which you just need to remember 6 algorithms.
The first algorithm solves the corners and the second algorithms solves the edges.

Corners
First we need to observe the position of the corner pieces, and there may arise three cases.

Case 1. All the corners are placed correctly. Then move to the Edge permutation part.
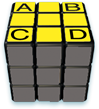
Case 2. The two adjacent corners are placed correctly, like A and C. Then keep the two corners to the left side and perform the algorithm:
R U Ri Ui Ri F R2 Ui Ri Ui R U Ri Fi
Case 3. If the two diagonal corners are placed correctly, like A and D. Then perform the algorithm:

(F R Ui Ri Ui R U Ri Fi) (R U Ri Ui Ri F R Fi)
After successful corner orientation, cube will look like this.
Edge pieces
Now here comes the 4 edge cases after the corners. Match the edge position with the cases given below and perform the algorithms accordingly.
 | R2 U R U Ri Ui Ri Ui Ri U Ri |
 | R Ui R U R U R Ui Ri Ui R2 |
 | M2 U M2 U2 M2 U M2 |
 | M2 U M2 U Mi U2 M2 U2 Mi U2 |
Perform these algorithms to solve the Rubik’s cube completely.
Now if you want to learn the whole PLL 21 algorithms, then you can refer to this table below.
PLL 21 Algorithm
 | x Ri U Ri D2 R Ui Ri D2 R2 | 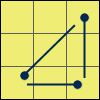 | xi R Ui R D2 Ri U R D2 R2 |
| R2 U R U Ri Ui Ri Ui Ri U Ri | | R Ui R U R U R Ui Ri Ui R2 |
| M2 U M2 U2 M2 U M2 | 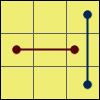 | R U Ri Ui Ri F R2 Ui Ri Ui R U Ri Fi |
 | Ri U Li U2 R Ui Ri U2 R L Ui | 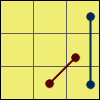 | R U Ri Fi R U Ri Ui Ri F R2 Ui Ri Ui |
 | L U2 Li U2 L Fi Li Ui L U L F L2 U | 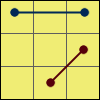 | Ri U2 R U2 Ri F R U Ri Ui Ri Fi R2 Ui |
 | Ri U Ri di Ri Fi R2 Ui Ri U Ri F R F | 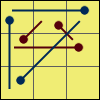 | R2 u Ri U Ri Ui R ui R2 yi Ri U Ri |
 | Ri Ui R y R2 u Ri U R Ui R ui R2 |  | R2 ui R Ui R U Ri u R2 y R Ui Ri |
 | R U Ri yi R2 ui R Ui Ri U Ri u R2 | 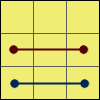 | Ri U2 Ri di Ri Fi R2 Ui Ri U Ri F R Ui F |
| M2 U M2 U Mi U2 M2 U2 Mi U2 | 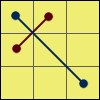 | F R Ui Ri Ui R U Ri Fi R U Ri Ui Ri F R Fi |
 | L Ui R U2 Li U Ri L U’ R U2 Li U Ri U | 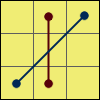 | Ri U Li U2 R Ui L Ri U Li U2 R Ui L Ui |
 | Xi R Ui Ri D R U Ri u2 Ri U R D Ri Ui R |
You can get all the possible algorithms to solve the rubik’s cube at AlgDb.


Congratulations, you finally did solve the Rubik’s cube with the Advanced method. Keep practicing to solve it within 30 seconds.
ALSO READ: “How to solve a Rubik’s cube in 10 seconds? The World Record Guide.”


