

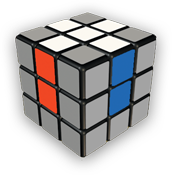
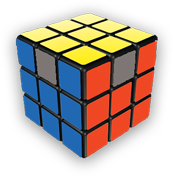
Everyone in the world knows what a Rubik’s cube is, and it’s a dream for everyone to solve it once. It has more than 43 quintillion possible permutations which makes it impossible to solve with some random moves.

Yet it is not that difficult to solve if you know the proper method.
There are many different types of method out there, which enables people to solve it within even 5 seconds. It’s what no one believes until they see it with their own eyes.
So, we will be discussing the easiest method for a beginner to solve the Rubik’s cube. This method uses very less number of algorithms, which you can remember very easily.
If you want to learn an Advanced guide, then go to my other page: “How to solve a Rubik’s cube in 30 seconds? Advanced guide.” Or “How to solve a Rubik’s cube in 10 seconds? The World Record Guide”
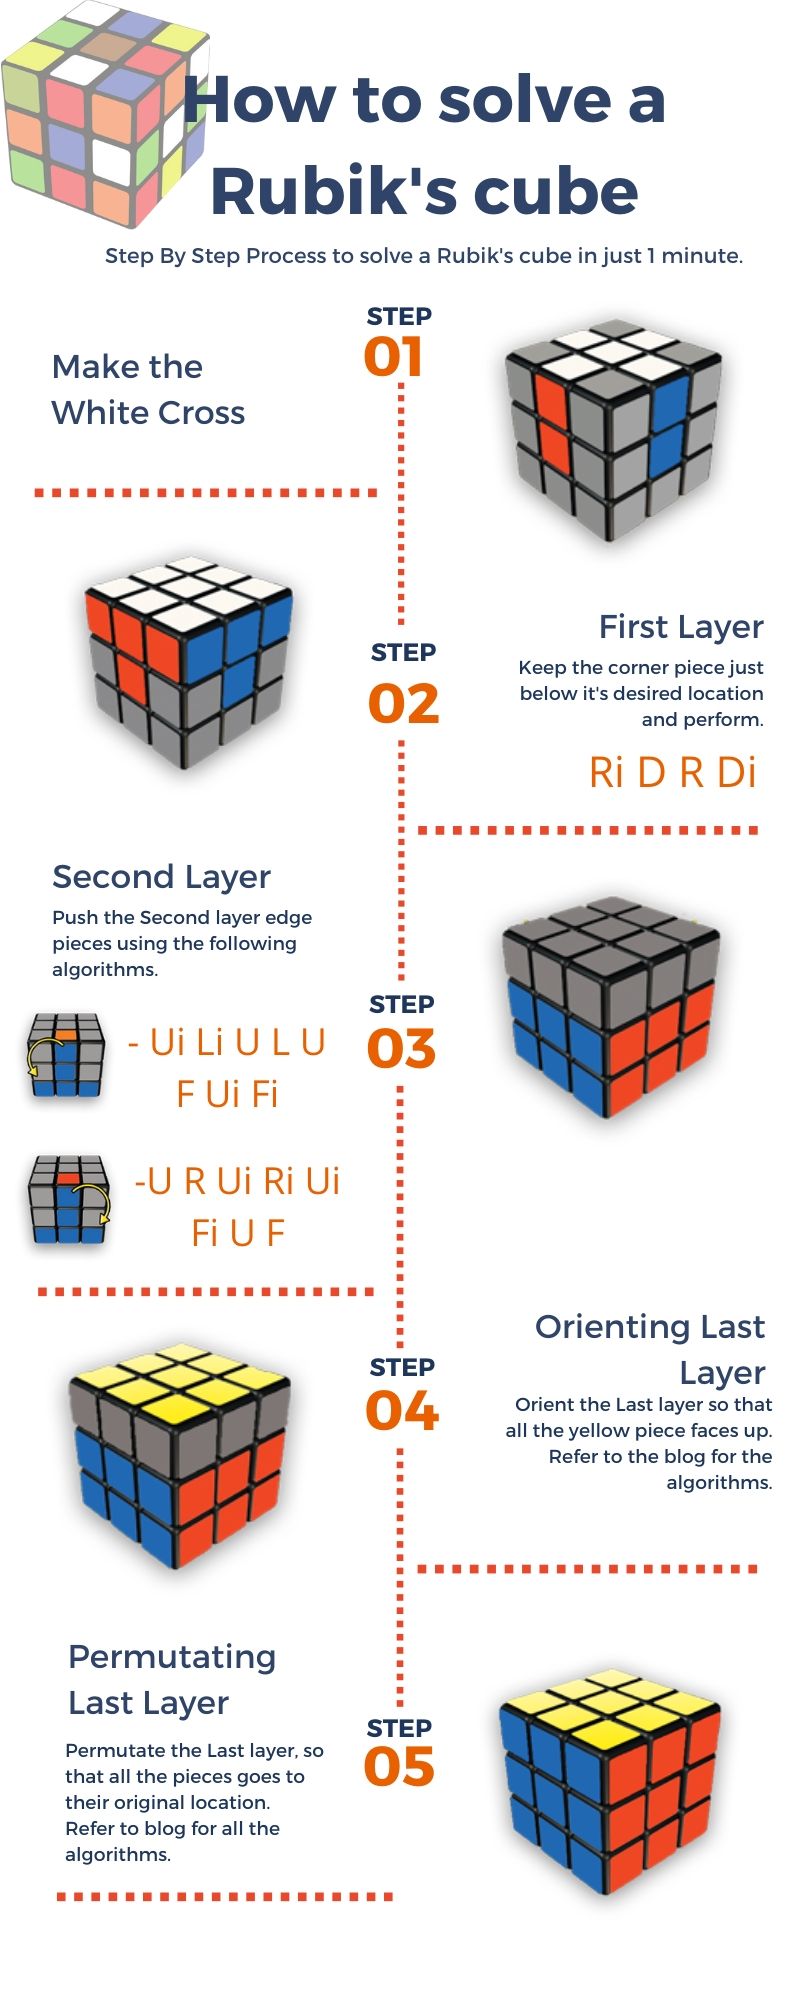
How to solve a Rubik’s cube?
- Concept used to solve Rubik’s cube
- Standard notations
- Making the Cross
- Placing the Corners
- The second Layer
- Orienting Last Layer
- Permutating Last Layer
Concept used to solve Rubik’s Cube
Now you have to believe in the fact that the cube cannot be solved by just making any random moves. If you want to solve it, you need to use a proper method.
So now let’s just understand how the methods work.
The cube is solved layer by layer. You can start with any colour and then end with the colour opposite to it. We’ll take white colour as our first layer.

ALSO READ : “Tricks of Rubik’s Cube (Patterns) – Impressing your friends”
Standard Notations of rubik’s cube
Now that you have understood the concept of solving the Rubik’s cube, you need to know the notations.
Notations are basically the commands which lets you know which move to make. Algorithms are formed by the sequence of notations. There are total 6 sides in the cube, which we can rotate freely. Therefore, we get 6 notations from this.

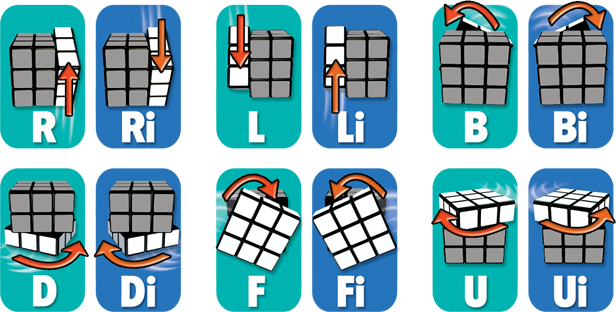
From the picture above you can see the notations along with their respective move. For example, if you need to perform the notation R, then you need to rotate the right-side vertical layer by 90° clockwise, and if you need to perform Ri, then you need to rotate the right-side vertical layer by 90° anti-clockwise.
In the notations “i” or “ ’ ” (apostrophe symbol) denotes anti-clockwise rotation and is called “inverse”. When the notation is written like R2, then you need to perform notation R twice, means rotate right layer by 180°.
Similarly, all the notations work, you just need to remember the name of the side. From the image, you can notice that only upper layer (U) and down layer (D) are horizontal, and the others are vertical layer.
So, when you get a whole algorithm written like: R Ui Ri U
You need to perform all the notations in the sequence it is written, first R then Ui, then Ri, and then lastly U.
Now we know all the basics of the Rubik’s cube, let us start with the solution.
ALSO READ: “Tricks of Rubik’s Cube (Patterns) – Impressing your friends”
Making the Cross
We need to select one colour for the first layer, and here we will be taking white as the first layer. Making a cross is not easy for everyone, because I can’t give you any fixed algorithm which will automatically make the cross, you need to hit and try.
Let’s start:

- First you need to hold the cube with white center facing up.
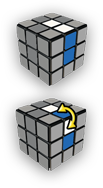
- Now find any one edge piece with white color, the other color may be green, orange, blue, or red. Here let us take the edge piece with white and blue color. Then bring that piece to the side between the white centerpiece and blue centerpiece. You will be getting either of the two cases.
- If you get the first case, then you are good to go with other edge pieces.
- If you get the second case, then you need to perform an algorithm. Face the cube, with white centerpiece upwards, and the desired edge piece to the right side, then perform the algorithm: Ri U Fi Ui.

- Do the same step with other 3 edge pieces. Remember matching the colour of the edge pieces adjacently with the centrepieces of white and other four colours.
- After making the cross you can see something like this. If you get this, then you are good to go.
Placing the corners
In this step, we need to push the corner white pieces to their respective locations, which will ultimately complete the first white layer.


- Hold the cube with a white centerpiece facing up.
- Now you need to find the corner pieces with white color. These corner pieces will have white and other 2 colors.
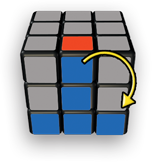
- Here let us take the corner piece with white, blue, and red color, now we need to bring it to the bottom layer, just below the original position of that corner piece, just like in the image.
- If the corner piece is in the upper layer, then you need to perform this algorithm to bring it down to the bottom layer, hold the cube with white facing up and the corner to the right, and perform: Ri D R
- Now that we have the corner piece in the bottom layer, perform the algorithm: Ri D R Di
Repeat this algorithm until the corner piece is aligned correctly.


- Repeat these steps with all the white corner pieces. after placing all the corners, you can see the cube will look like this. Now you’re good to go to another Step.
Now we are done with the First white layer, and I know for the beginners it is quite confusing, but you’ll better with practice.
Note: After the second layer is complete now remember you have to hold the cube with yellow centerpiece facing upwards until the cube is solved.
The Second Layer
Now in the second layer, we need to fix just 4 edge pieces. These pieces have 2 adjacent colours of the four colours green, orange, blue and red.
Hold the cube with yellow centrepiece facing upwards, and find the non-yellow edge pieces.
- Here let us take the edge piece with blue and red colour, now you need to see which colour is facing front, and move the piece accordingly, by rotating the upper layer, to its respective side making a vertical line. Like in the picture the edge piece with blue colour facing front is aligned with the blue centrepiece to make a vertical line.

- Now the upward facing colour will decide whether the piece will move to left or right. Like in the picture red colour is facing up, and in the cube the red colour is to the right of the blue, so we must move the piece to the right middle layer between the blue and the red. It can be done by holding the cube with the yellow centrepiece facing up and the desired edge piece facing front, and perform the algorithm: U R Ui Ri Ui Fi U F

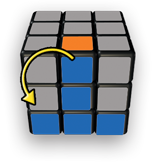
- Now in the other case with edge piece moving to the left like in the picture, you need to perform another set of algorithms: Ui Li U L U F Ui Fi
- In case the edge piece is already in the middle layer but in wrong position, then you need to perform either of the two algorithms, to replace it with a yellow edge piece, which will ultimately bring the edge piece to the upper layer. Now you can place the edge piece in its desired location using the algorithm.

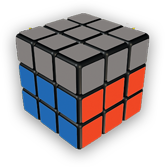
- Perform the same procedure with the other 3 edge pieces and this will ultimately complete the middle layer and look like this.
Orienting Last Layer
So, here comes the last layer, the yellow layer. Now in this step we need to orient all the yellow pieces to face up.
The Yellow Cross
First, we will make a yellow cross. Don’t worry you need not match the edge with the adjacent side colors, we will do that in the Permutating step.

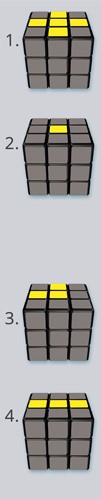
Now just look at the yellow center and the edge pieces, ignore the corner pieces for a second, you will get one of the four cases shown in the picture (you need to rotate the upper layer to match with the Cases exactly as shown).
Case 1. Proceed to the “Orienting the Yellow Corners” step.
Case 2. Perform the algorithm: F U R Ui Ri Fi. Now match the position with Case 3 and Case 4 and proceed accordingly.
Case 3. Perform the algorithm: F U R Ui Ri Fi.
Case 4. Perform the algorithm: F R U Ri Ui Fi.
Orienting the Yellow Corners
Now that we have the Yellow cross, we need to orient the corners to complete the layer orientation. After making the cross, you will get many cases like

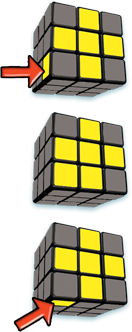
Case 1. None of the corners has a yellow color facing up. Then rotate the upper layer to get the left facing yellow corner piece in the left, as shown in the upper picture, and perform the algorithm given below.
Case 2. One Corner has the yellow colour facing up. Then hold the cube as shown in the middle picture and perform the algorithm given below.
Case 3. Two corners have the yellow color facing up. Then rotate the upper layer to get the front-facing yellow corner piece in the left, as shown in the bottom picture, and perform the algorithm given below.
R U Ri U R U U Ri
After performing the algorithm once, match the positions with the cases above and perform the algorithm accordingly. Repeat it until all the yellow corners are oriented. The cube will look like this. Now proceed to the permutation step.

Note: There are no such cases of three corner pieces with yellow color facing up, if such case arises with you, then it’s obvious that any one of the 8 corner pieces is turned. To fix this you need to turn that corner piece to face the yellow color up.
Permutating the Yellows
Now that we have all the yellows facing up, we need to position the yellow pieces in their correct locations. For this we have to first position the corners and then the edges.
Corners

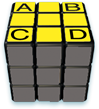
First we need to observe the correctly positioned two corner pieces, it may be either adjacent like A and B or diagonally placed lke A and D, or B and C. You need to rotate the upper layer to check the correctly positioned pieces.
Case 1. If the two adjacent corners are placed corectly, then move them to the back then perform the algorithm
Ri F (Ri B B R) Fi (Ri B B R) R Ui
Case 2. If the two diagonal corners are placed correctly then perform the above algorithm once then look for two adjacent corners fixed correctly, place them back and perform the same algorithm again. It will fix all the corners in their correct position.
After successful corner permutation, cube will look like this.

Edge pieces
Now comes the last part, fixing the edge pieces.
Here you will see either one of the edge piece is placed correctly or none of them is placed correctly, and if lucky enough all the edge pieces may be placed correctly, which means the cube has been solved.

Case 1. One edge piece is correctly placed. Then perform the algorithm given below accordingly, while holding the cube with the correct piece at the back side of the cube.

Case 2. None of the edge pieces is placed correctly. In this case, perform any of the algorithm given below then follow Case 1.
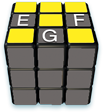
Algorithm to rotate EGF clockwise:
F F U L Ri F F Li R U F F
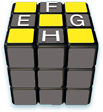
Algorithm to rotate EFG anti-clockwise:
F F Ui L Ri F F Li R Ui F F
Congratulations, finally we have solved the cube using just 11 algorithms.


Learning these 11 algorithms is not too hard, you need not learn the notations in your mind, you just need to practice and practice, your muscle memory will automatically memorise the steps in sequence.
If you want to learn all the algorithms of the Rubik’s cube then go to AlgDb
The beginners guide will allow you to solve Rubik’s cube in minimum 1 minute. To learn solving it within 30 seconds, head towards my advanced guide “How to solve a Rubik’s cube under 30 seconds? Advanced guide”
ALSO READ: “How to solve a Mirror Cube? A Shape-shifting Cube with no Colors.”


